It allows you to keep track of your code changes, create different code branches, collaborate with other developers, to name a few. Linux Kernel, one of the popular open-source projects, is also hosted on a Git repository. In this article, we’ll cover installing Git on CentOS, Ubuntu, and Windows operating systems.
Git on CentOS 6.x/7.x
To install Git on CentOS release 6.x/7.x or RHEL 6.x/7.x, we’ll use yum package manager. Run the below command to install Git: If prompted to confirm like below, confirm by pressing ‘y’: Below is the installation snippet of Git on CentOS 7 minimal setup (please note dependencies installed along with Git may differ on your installation based on your OS version and installed packages):
Git on CentOS 8.x
To install Git on CentOS release 8.x or RHEL 8.x, we’ll use DNF package manager. Run the below command to install Git: If prompted to confirm, press ‘y’: Here’s the installation snippet of installing Git on CentOS 8:
Git on Ubuntu
On Ubuntu, the simplest way to install git is to use an apt package manager. First, update the apt package index by using the below command: Now, run the below command to install Git on Ubuntu: $ sudo apt install git If prompted to confirm, press ‘Y’: Below is an installation log snippet for installation on Ubuntu 20:
Git on Windows
Windows binary installers are available from the official Git site. Download the applicable installer to your Windows system. As of version 2.29.2, it offers 32 bit and 64-bit versions of Git; choose the one that matches your needs and system architecture. Most new systems support 64-bit architecture, and the default downloader provided by the site should be good for most purposes.
Launch the downloaded Git installer, and the installation wizard should pop-up. Accept any prompts that Windows’ User Access Control may show at the beginning of the installation. The installer will request Administrative access and should be accepted for the installation to succeed. A portable version of Git is also available, which can be used as an alternative if the installation isn’t possible using normal means due to administrative restrictions. Accept the License agreement and click on Next.
Specify the installation path for Git or leave the default one shown in the dialog. Click Next to continue.
Select Components dialog allows you to select Git components that should be available post-installation. Default options should be good for most purposes. Click Next once required components are selected.
Start Menu shortcut option is shown next. Click Next to continue.
The next dialog allows you to select the default editor that will be used by Git. Vim, which is the popular Linux CLI editor, is supported and is selected by default. You’ve got the option to select a different editor like Notepad++ etc., in the drop-down list if you prefer. Click Next once confirmed.
For most cases, an initial branch naming option can be left as it is. Click Next to continue.
Git will be added to the Windows PATH variable to be accessible from other programs like Command Prompt etc. Select option 1 if you want to use Git only from Git Bash only, installed as part of Git installation. Then proceed by clicking Next.
Secure Shell or SSH executable is needed for network-related actions for Git like push and pull requests. The default option of OpenSSH provided with the installer should be good for most cases and, as such, can be left as it is. Click Next to proceed.
The default option can be selected for the OpenSSL library. This is a choice between the SSL library provided by Git and the one that comes with Windows. Click Next to continue.
Commit style needed to be confirmed, and Windows and Linux/Unix systems interpret end-of-line differently. To make the code compatible between different development platforms, Git must know how the code file has an end-of-line character specified and if this needs to be switched to another style. Again, the default option is good here, and all the switching and conversion happens in the background by Git. In case another setting is required, consult your Git code administrator. Then click Next to proceed.
Terminal emulator allows you to have either a BASH-like environment or Windows Command Prompt as the default console. Both options work well and depend upon user need requirements. Click Next to continue.
The next option is to specify the default “git pull” behavior. A default option should be selected unless you’re sure you need to change it to one of the non-default ones. Click Next to continue.
Credential Manager stores your secrets like passwords and keys that you use to login to different remote Git repositories. The first option should be good as Git Credential Manager has been deprecated. Click Next to proceed.
The next dialog allows you to select some extra options like file system caching and symbolic links. Click Next, once you select the required options.
Experimental options allow you to enable features that aren’t fully developed and tested yet. You can leave them unchecked unless you’re sure you need those. Click Install to proceed with the installation of Git with the selected options.
Git installation will start, and progress will be shown. Please wait for it to complete.
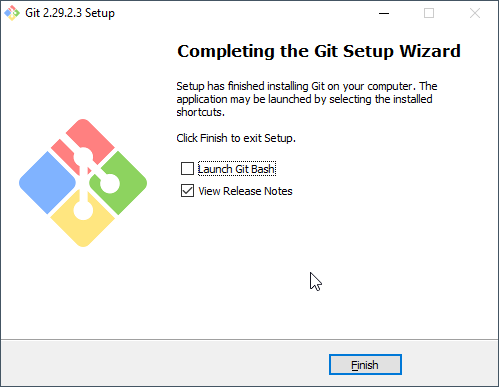
A final dialog allows you to launch Git Bash:
You’ll be able to launch Git Bash or Git GUI using Windows Start Menu. Git Bash is the similar command line CLI that Linux offers and supports all Git commands. You can verify the Git version as shown in the screenshot below:
Verifying Git
To verify your Git installation and check its version, use the below command in the Linux terminal (or Git Bash in Windows):
Further Reading
You can learn more about Git here or take this definite course. Next, get familiar with GitOps.
![]()
![]()


![]()
![]()
![]()
![]()

![]()


![]()
![]()
![]()

